
目錄表
[Git]
Git 學習資源 點我
安裝-Git
- 再按下[Click here to download]。

- 等候下載完畢,打開安裝程式,後續可以都以預設的選項持續按下[Next]。以下安裝畫面過程提供參考


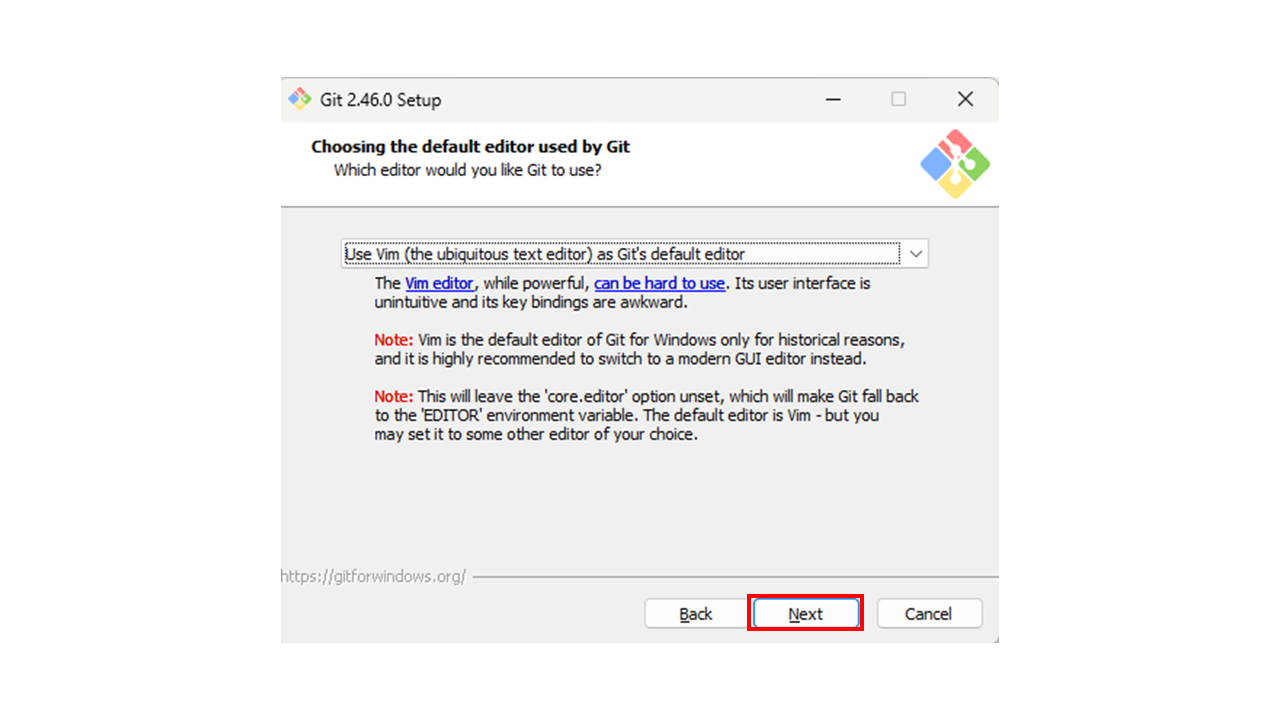
- 此步驟可以選擇自己習慣的文字編輯工具。
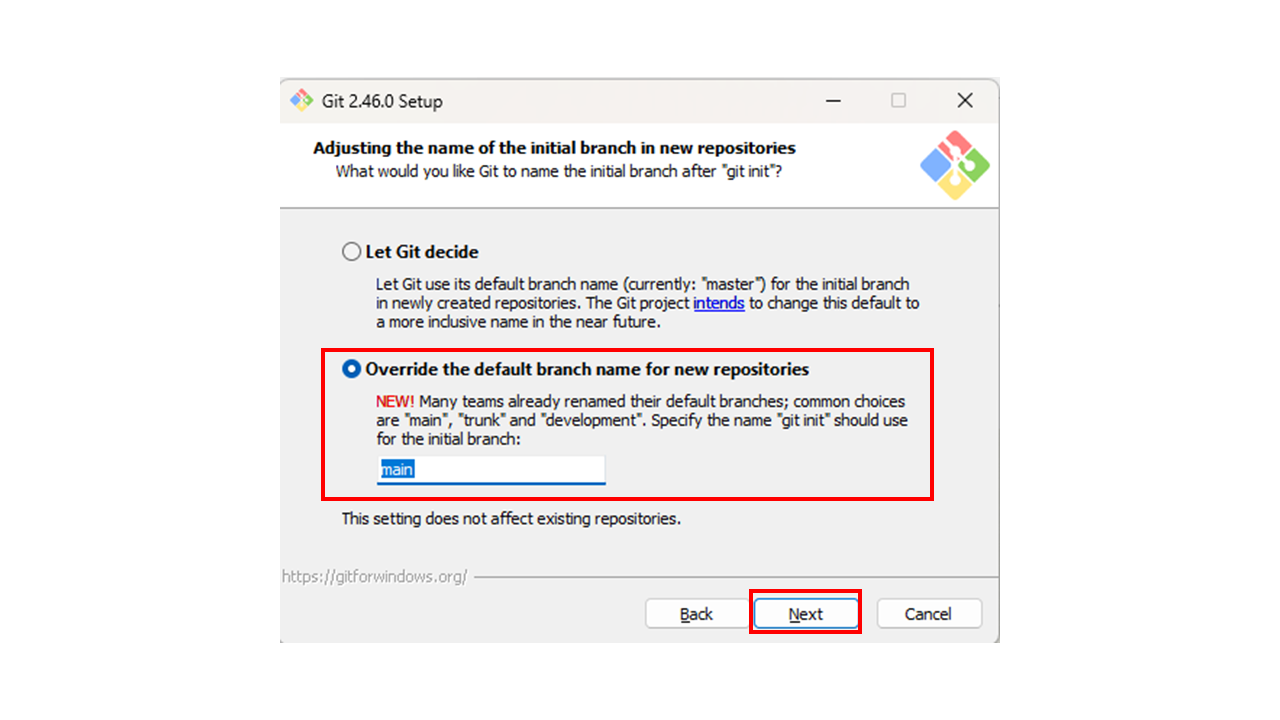
- 預設分支需要更選項並設定為main(舊版gitlab為master)。
- 請同學持續按下[Next]。以下安裝2.46版本安裝畫面過程提供參考


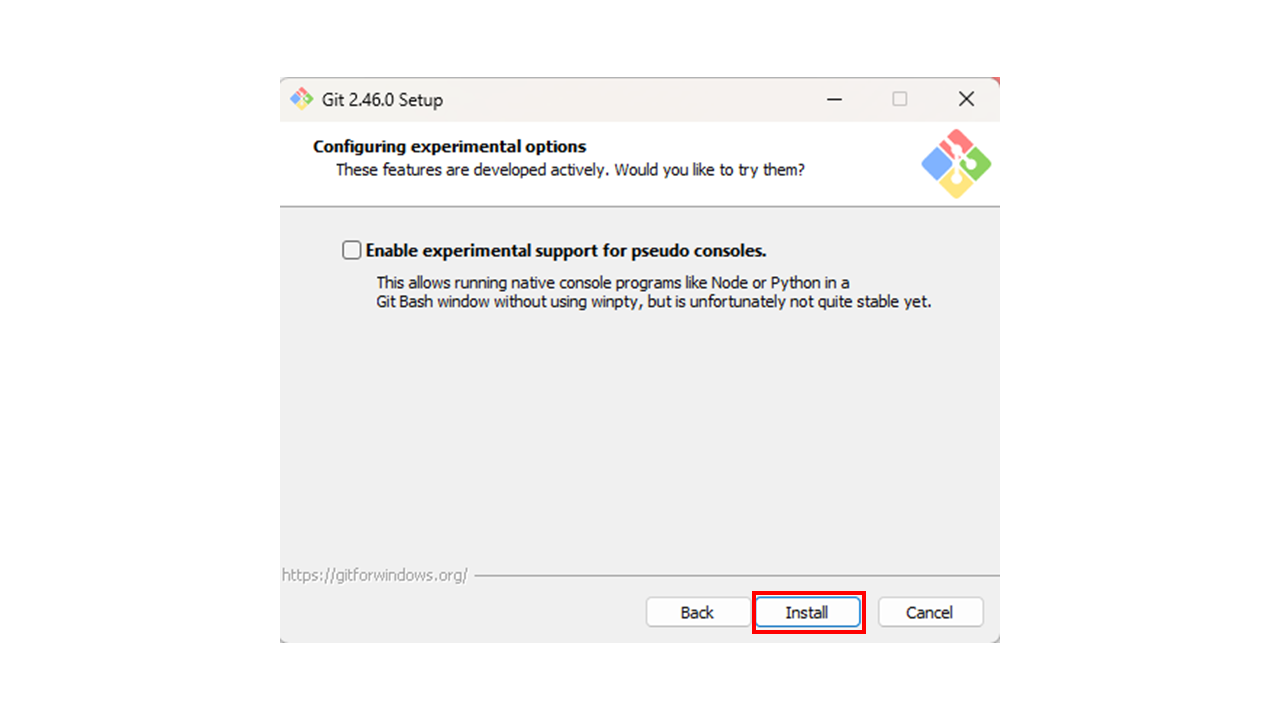
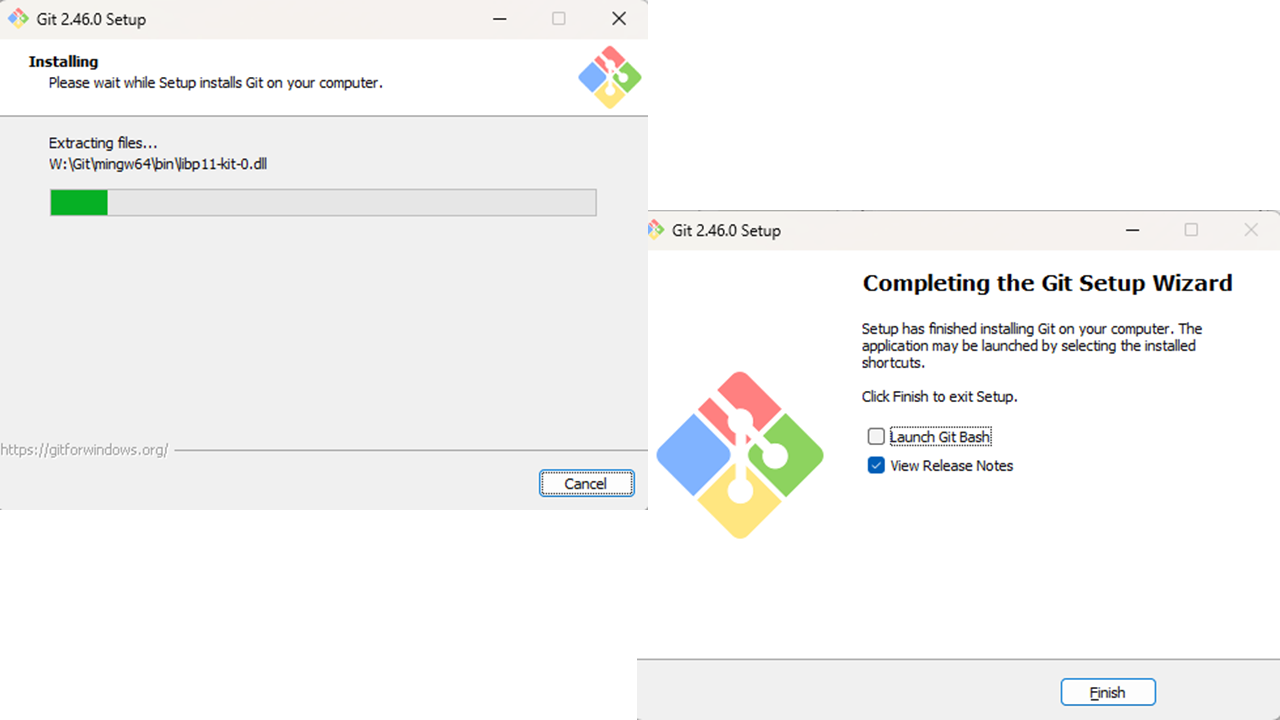
- 按下[install]並等待git下載完成。


[GitLab]
相關帳號已建置,帳號:cbb???XXX(學號);信箱cbb???XXX@ws.csie2.nptu.edu.tw,請先行登入系計中工作站ws(workstation)並修改密碼再登入系計中。
登入系計中-GitLab
- 系計中使用SSO(single-sign-on)的連線機制來進行連線,請先行登入系計中工作站ws(workstation)並修改密碼再登入系計中,上述操作所更改的密碼將會應用到GitLab上,若有同學們之前尚未修習過卓俊老師的程式設計、物件導向程式設計等課程,請與課程助教及系計中管理員獲取系統隨機生成的一次性密碼信件函,並於ws(workstation)中進行登入並修改為自己的密碼。
- 如果無法連上登入入口,請使用傳統GitLab登入入口進行登入GitLab登入(傳統登入)


本學期為Software-Engineering/2025-Fall-SE
查看-Groups-群組-與-Repository-儲存庫
- 登入後,左邊選單點選[Groups]查看所有Group與相關資訊在這邊會看得到自己所屬於的Group為Gxx(這邊舉例為G00)。

- 點進去後可以看到自己組別的所有子群組(SubGroup)以及儲存庫

- 儲存庫的內容及檔案


下載GitLab的Repository(以G00 easypainter為例)
獲取GitLab 的 Access Token
- 請根據以下步驟來獲取GitLab的Access Token


- 請將Access Token複製存放到一個隱密的文字檔案中,此token僅會出現一次,如果未妥善保存則需要重新更新或生成Access Token。


Command Line Interface(CLI)
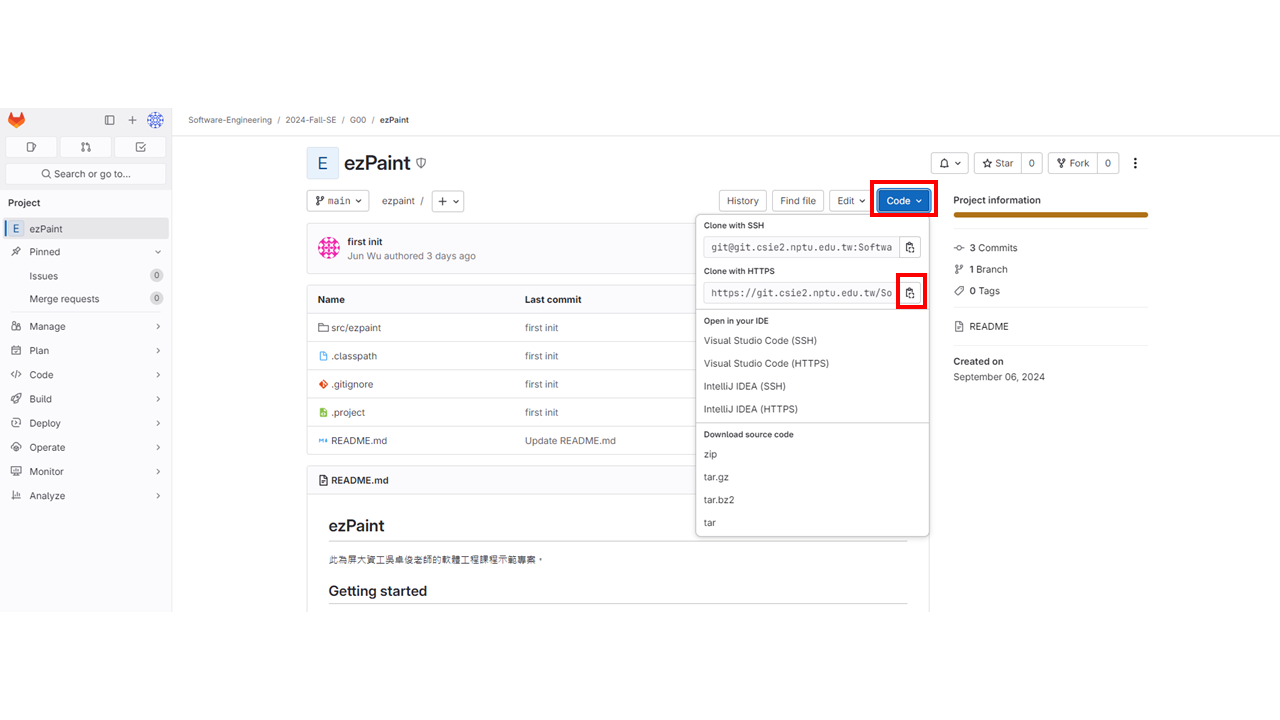
- 我們以老師上課所設計的G00專案為例,請至系計中網頁GitLab,GitLab帳號密碼為系計中(ws)ssh連線的帳號密碼,進入網頁後請按下Code的藍色按鈕並複製Clone with Https的url連結。


Windows OS系統教學
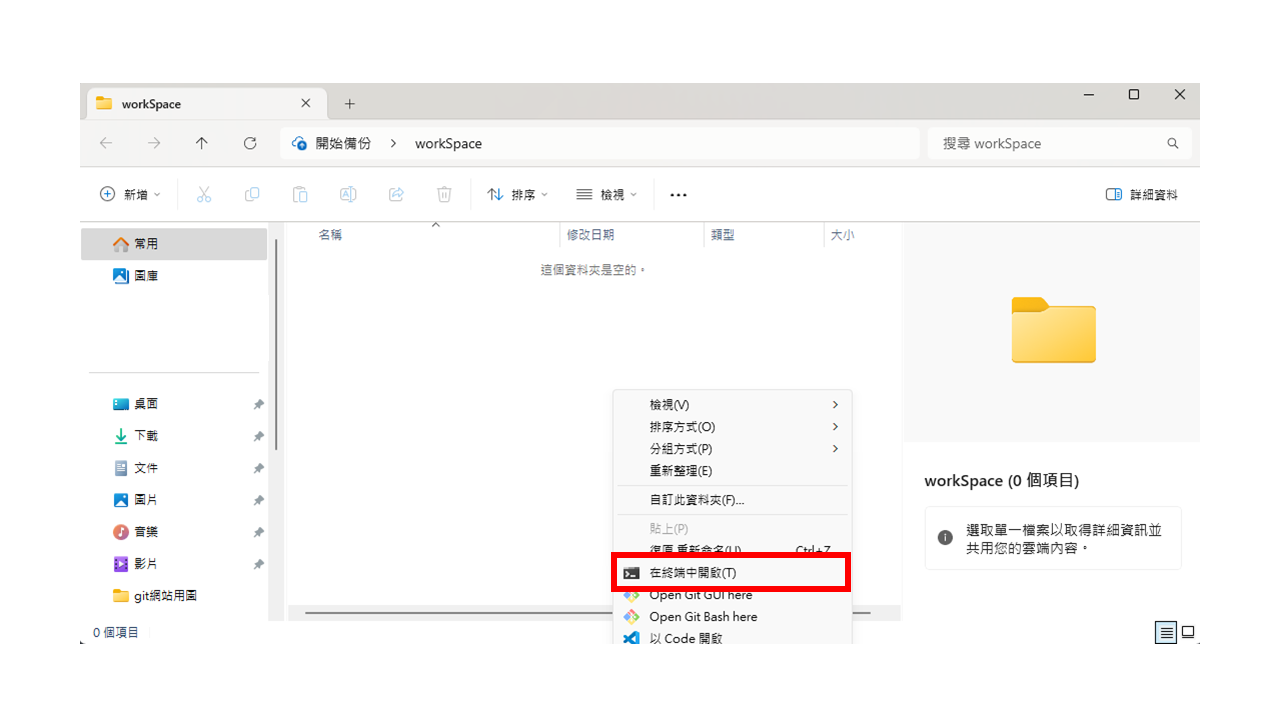
- 建立一個要存放的資料夾。

- 在按住Shift並點下滑鼠右鍵,按下[在終端中開啟(T)]/(Shift+滑鼠右鍵+T)。
- 打開資工系計中GitLab網站並登入,進入到Group-G00-ezPaint 的 Repository,點擊[code],上面會有 Clone with HTTPS 的文字 ,點選旁邊的[ Copy URL ]可以將網址複製到剪貼簿。
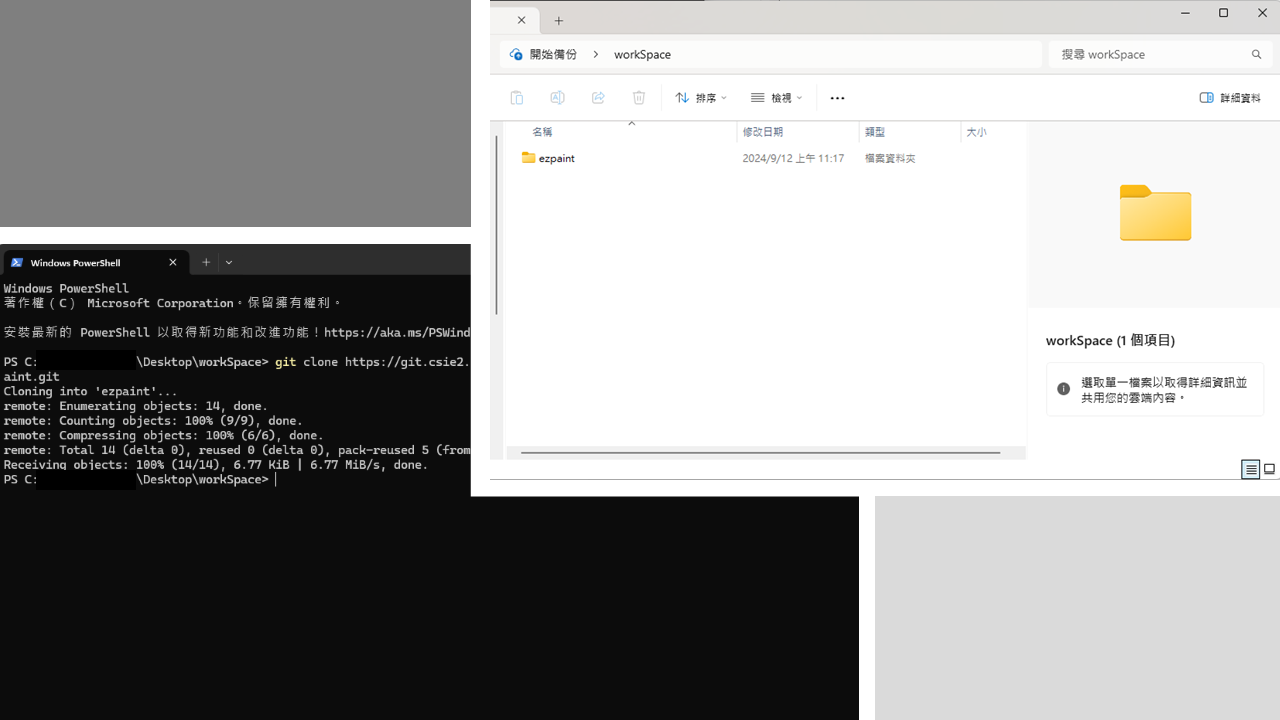
- 在剛剛打開的終端機中打入
git clone https://git.csie2.nptu.edu.tw/Software-Engineering/2025-fall-se/g00/easypainter.git(git clone 剛剛複製剪貼的內容)。
- 帳號為學號,密碼為剛剛所生成的Access Token
- 輸入完以上指令後即設定完成,Repository內容將下載至資料夾中。


Mac OS系統教學
- 請打開終端機,並在所要存放儲存庫專案的地方輸入
git clone <儲存庫專案的url>
帳號為學號,密碼為剛剛所生成的Access Token
- 可以看到剛剛所複製的儲存庫專案內容已經成功克隆(clone)到本機端


如果已經完成的同學請下載好Eclipse後查看 Eclipse Git 教學 Eclipse Git 教學 的部分,根據教學的介紹eclipse smart import後來去載入eclipse專案(#教學使用G99,此處老師的G00為類似操作。)
建立-GitLab-上的-Repository
- 進入G0?這個 Group 後,點下[new Project]/[Create new Project]來建立新的Project。

- 選擇[Create blank project]。

- 請在 Project name 的部分打上各組專案名稱,並按下[Create Project]。

- 完成 Project 建立後即會看到此畫面。

- 請同學建置程式碼的專案外也同時建立一個名為documents的專案,之後畫流程圖和相關說明文件都可放在此專案中。

- 建立完專案後請在當前頁面左手邊的Setting→Access Tokens,此Access Token將會用於Eclipse Clone Repository時的輸入密碼。

- 請輸入Token name、Expiration day[2026-01-01]和select a role[Maintainer],然後按下create Project按鈕。


- 之後會有一個access token出來,請同學按下眼睛符號查看access token,並複製到屬於自己的筆記本。(請切記,同學如果遺忘或者弄丟access token,則需要重新建置或者更新一個access token。)


[Eclipse]
安裝-Eclipse
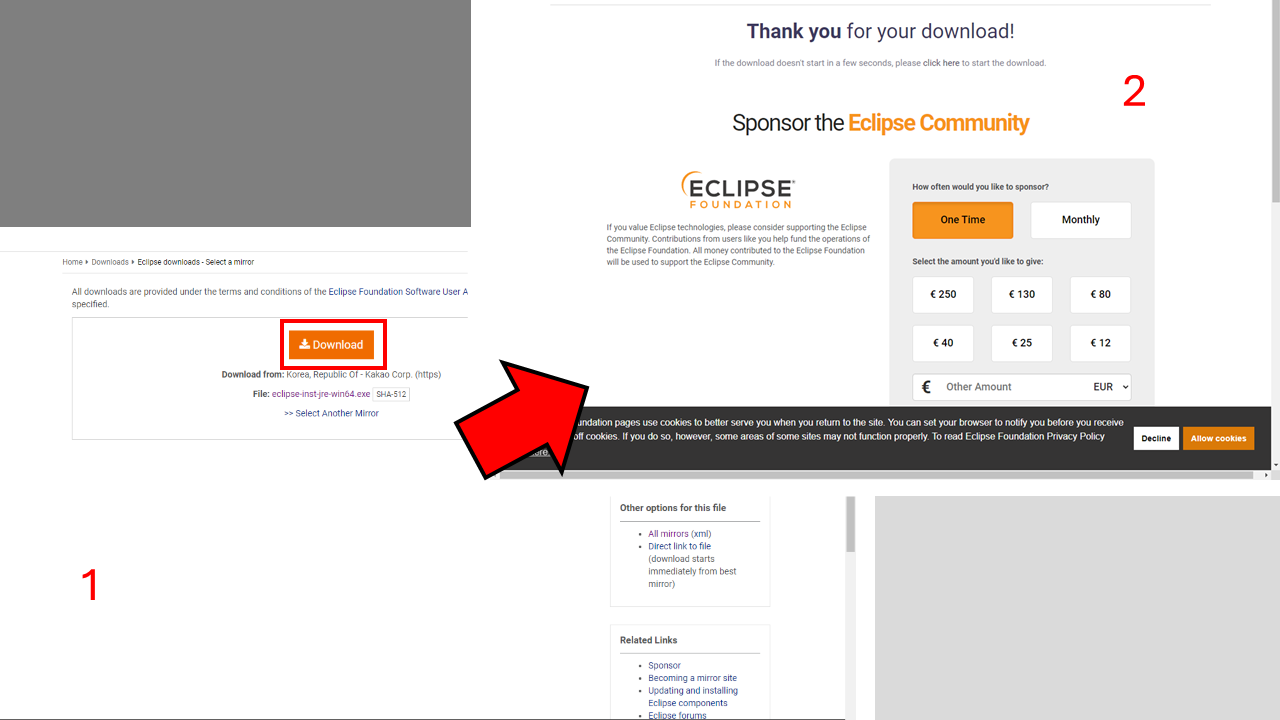
- 前往 Eclipse 下載網站並按下[Windows x86_64]。

- 按下[Download],跳轉畫面並等待下載。
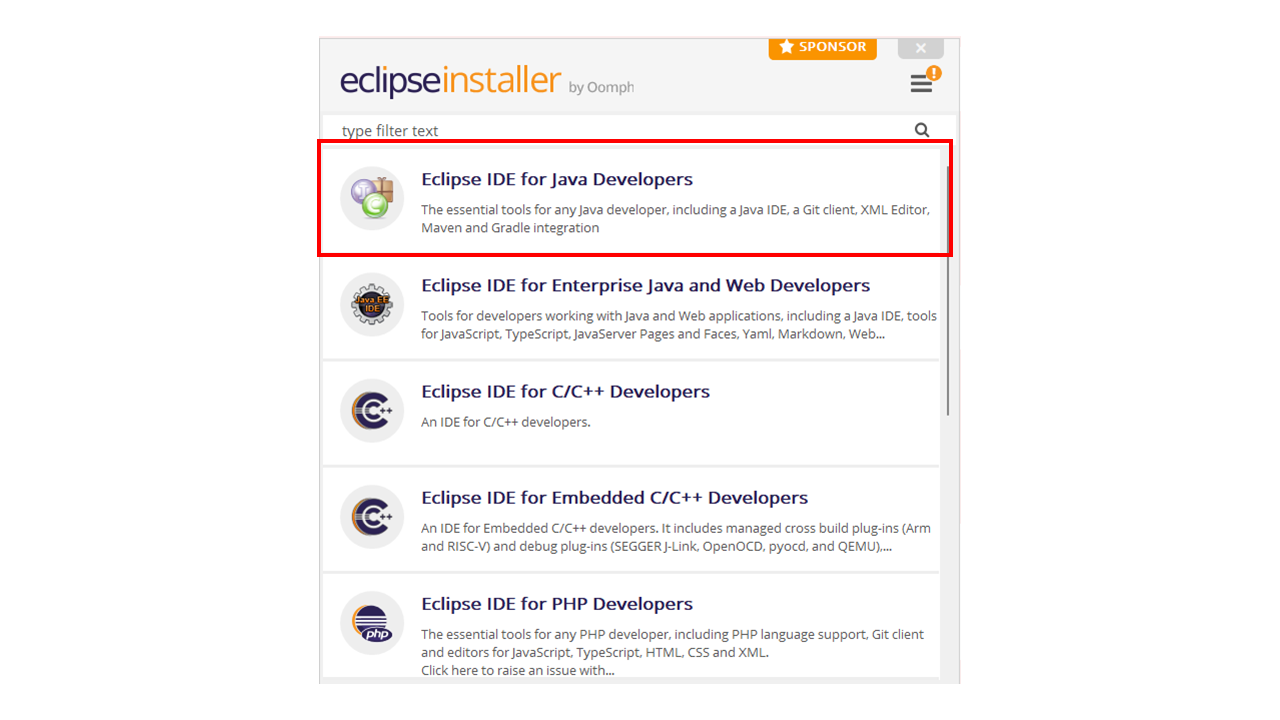
- 下載完成後打開安裝程式,選擇[Eclipse IDE for Java Developers]來進行安裝。
- 選擇[Java Development Kit (JDK) 23.0.2],按下[Install]。

- 等候安裝完成並按下[LAUNCH]。

- 直到顯示 Eclipse 視窗,安裝就完成了。(同學可以自選儲存的路徑以及檔案位置)


Eclipse Git 教學
相關學習資源 Connect Eclipse To GitLab
- 下載後Eclipse後點擊左方的import projects,然後點擊Project from Git(with smart import)

- 然後點選clone URI,之後點選Next。

- 接下來請同學到Gitlab所創建的專案點擊Code按鈕,並複製 Clone with HTTPS的連結。

- 回到Eclipse,請同學將複製的url貼上URL(貼上後會自動填入Host及Repository Path),並於下方的Authentication部分填入User(學號)和Password(之前所創建的Access Token)(如果忘記的同學請重新生成一次),如果希望儲存密碼的同學請勾選然後按next。(同學如果之後遇到輸入帳密,請按照此步驟。)

- 接下來請同學持續按下Next直到finish


- 沒有意外的話同學就能看到左上方有一個mynewproject出現了。請同學嘗試將這個只有readme的專案push到main branch上吧!(推空專案的原因是為了測試git)


- 看到uptodate,代表本機端和遠端的儲存庫專案內容是一致的不用更新。

- 想要將所新增的專案內容和檔案上傳到Gitlab上的話我們通常稱為commit,讓我們來測試一下上傳功能吧!先在剛剛的專案內容新增一個Test.java,右鍵專案並新增檔案

- 新增好後請右鍵專案資料夾→Team→Commit

- 同學們會看到尚未新增到commit的未更新檔案(Unstaged files)

- 請按下++來將所有未更新的檔案變為準備更新的檔案(staged files),以及撰寫commit Message。Commit Message主要用以作為此次更新有增加什麼內容和功能,修改了哪些bugs等,如|features: | fixed: | modified: | 等等的標頭更容易辨識此次commit的用途歐!撰寫好後按下Commit And Push即可上傳。

- 完成後的視窗。

- 建議同學每次開始寫扣時都先pull專案到本機端,這樣才不會和小組同學們上傳的程式碼有版本衝突!(merge conflict)

- merge conflict的教學則等同學實作遇到時自己解決了!
- 網路上的merge conflict的教學影片,印度的一位先生錄影的,建議開字幕。


補充教材:Git 指令 教學
同學們如果想要自行用指令的方式來做版本控制而非使用Eclipse內建的Git模組,則我有推薦一些網站可以自學Git,希望大家都能使用這個很棒的工具!(請大家除了使用學校的GitLab外也嘗試註冊並使用GitHub吧!)
模擬Git的關卡遊戲
Git官網手冊
Git指令說明
現在我來跟大家說明如何使用指令來將本機端儲存庫推上遠端(GitLab)的儲存庫:
我使用mac環境來建置git,請windows的同學們使用windows terminal(windows終端機)或是powershell來進行Git的建置。
之前在eclipse git說明中有提到創建一個小專案名為mynewproject,現在我們依舊使用這個專案來進行說明,可以看到mynewproject現在是沒有git的狀態(disconnective)。
使用git前請先檢查是否有安裝git:
git --version尚未安裝的同學請自行按照環境安裝git
請同學在電腦選擇一個路徑來創建資料夾來做為git的repository,然後進入此資料夾(之後eclipse專案儲存的地點就在此處):
mkdir gitTest
cd gitTest
若同學打算使用 Git 來追蹤(track)現有的專案,只需要進入該專案的資料夾並執行:
git init (# 初始化儲存庫)

在Gitlab上建立一個project,使用之前的myNewProject為例,先到code複製已經創建好的專案的url。
然後請到終端機介面輸入
git remote add origin <剛剛複製的url> (# 綁定遠端名稱為 origin)

git fetch
之後,Git 會從遠端抓取最新的分支資訊。 在輸出訊息中可以看到:
* [新分支] main -> origin/main
這代表本機端新增了一個 遠端追蹤分支 (remote tracking branch)
`origin/main`,它是遠端 `main` 分支的快照。
注意:這裡建立的是 `origin/main`,並不是本地可直接操作的 `main` 分支。
執行 `git fetch` 後,在 Git GUI 或 `git branch -r` 中,就能看到多了一個遠端追蹤分支 `origin/main`。

輸入下列指令能夠查看目前有追蹤遠端哪個分支的快照
git remote -r

輸入下列指令能夠查看本機端是否有建立分支,我們能夠發現目前本機端沒有任何分支:
git branch

如果要建立一個真正的本地分支來追蹤它,可以使用:
git checkout -b main origin/main可以發現目前已經位於main分支了

接下來我們需要建立一個commit,讓我們先建立一個測試檔案myCommit.java:
touch myCommit.java
然後輸入下列指令來查看git的狀態,可以看有哪些有哪些檔案未被追蹤以及Unstage files和staged files。
git status

同學可以使用
git add myCommit.java
也可以輸入
git add . (#將所有未追蹤檔案變為被追蹤檔案)來將myCommit.java變為被追蹤的檔案。

然後輸入
git commit -m "myfirst commit"來設定第一次的commit message。

我們可以看到git commit後有一段文字顯示我們尚未將這個主機設定上傳的個人身份,因此需要進行設定:
git config --global user.name "你的名字"
git config --global user.email "你的信箱"
git config list (#查看個人訊息)

接下來請使用
git push
來將目前的commmit推送到遠端(gitlab)進行版本更新
回到GitLab介面,我們push完成了!!!(恭喜撒花)

請記得在每次寫扣之前都要pull一次GitLab的程式碼,小組夥伴們可能有push上去。
git pull

如果我們想將專案複製下來要怎麼處理呢? 請使用
git clone <專案的url>來將遠端(GitLab)的儲存庫內容複製到本機端

 進入到剛剛複製的專案資料夾後可以查看是否有缺失
沒問題的話回到Eclipse,我們可以導入(import)剛剛複製到本機端的專案資料夾,請查看下列步驟:


 如果同學沒有看到[儲存庫名稱 main]
 請對專案按下右鍵,team→share project,eclipse可以自動抓取.git的資料
 成功將遠端的專案用指令的方式抓回eclipse了!!!!(好累,完結撒花)